

Although the correct way to start and shut down a computer is a well-known topic, some people are still uncertain about the proper operating steps. Today, let’s learn about it.
01
The Correct Process for Powering On a Computer
- Ensure that the power outlet providing electricity to the computer is live, and the plug is correctly inserted into the outlet. Do not place any objects on the outlet to prevent poor contact, which could lead to abnormal power supply.
- Begin by turning on the power switch of the monitor and confirm that the monitor’s indicator light illuminates. The purpose of turning on the monitor first is to observe the self-diagnostic information during the computer’s startup.
- Turn on the power switch of the computer’s main unit. You will notice lights on the main unit’s panel and the optical drive starting to illuminate with intermittent blinking. You’ll also hear the fans inside the computer case begin to spin. The monitor will begin displaying hardware startup self-diagnostic information, and any abnormalities will be indicated with error messages.
Note: If you turn on the main unit before the monitor, and there is an issue during self-diagnosis, you won’t be able to see it, and you will need to restart the computer.
02
The Correct Process for Shutting Down a Computer
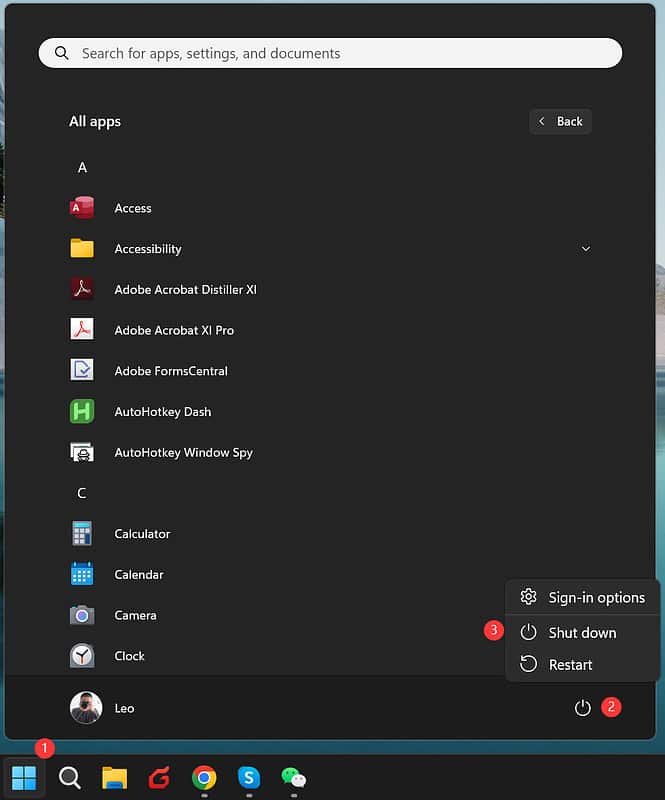
- Use the computer’s operating system program to shut down. Press the Windows key once, or move the mouse cursor to the bottom left corner of the screen and click on the Windows icon. Then, click on the power icon. In the menu that appears, select “Shut Down.” Wait until the computer’s main unit is confirmed to be powered off before turning off the monitor. Sometimes, programs may freeze, and you may need to repeat the process. If you turn off the monitor first, you won’t be able to confirm if the shutdown is complete.
- Avoid using a forced shutdown. A forced shutdown involves holding down the power button on the main unit to forcibly cut off power to the computer. This can potentially damage the computer’s hardware, especially the hard drive.
- Never directly disconnect power to the computer. In situations where you’re in a hurry, it’s essential not to casually unplug the computer or switch off the power supply directly. When power is restored, the computer may start up immediately. Simultaneously powering multiple electrical devices can result in unstable voltage, increasing the risk of hardware failure in the computer.
03
How to Handle a Computer When Not in Use
Computers come with a built-in “sleep” function designed for times when users temporarily do not need to use the computer. This feature allows the computer to reduce power consumption to a minimum while still enabling a quick startup when needed. You can configure this through power management settings. The “sleep” state can be activated manually or set up to occur automatically after a period of inactivity. When you’re ready to use the computer again, simply press any key on the keyboard or press the power button to quickly wake it up.
04
Setting Up Automatic Sleep Mode in Computer Power Settings
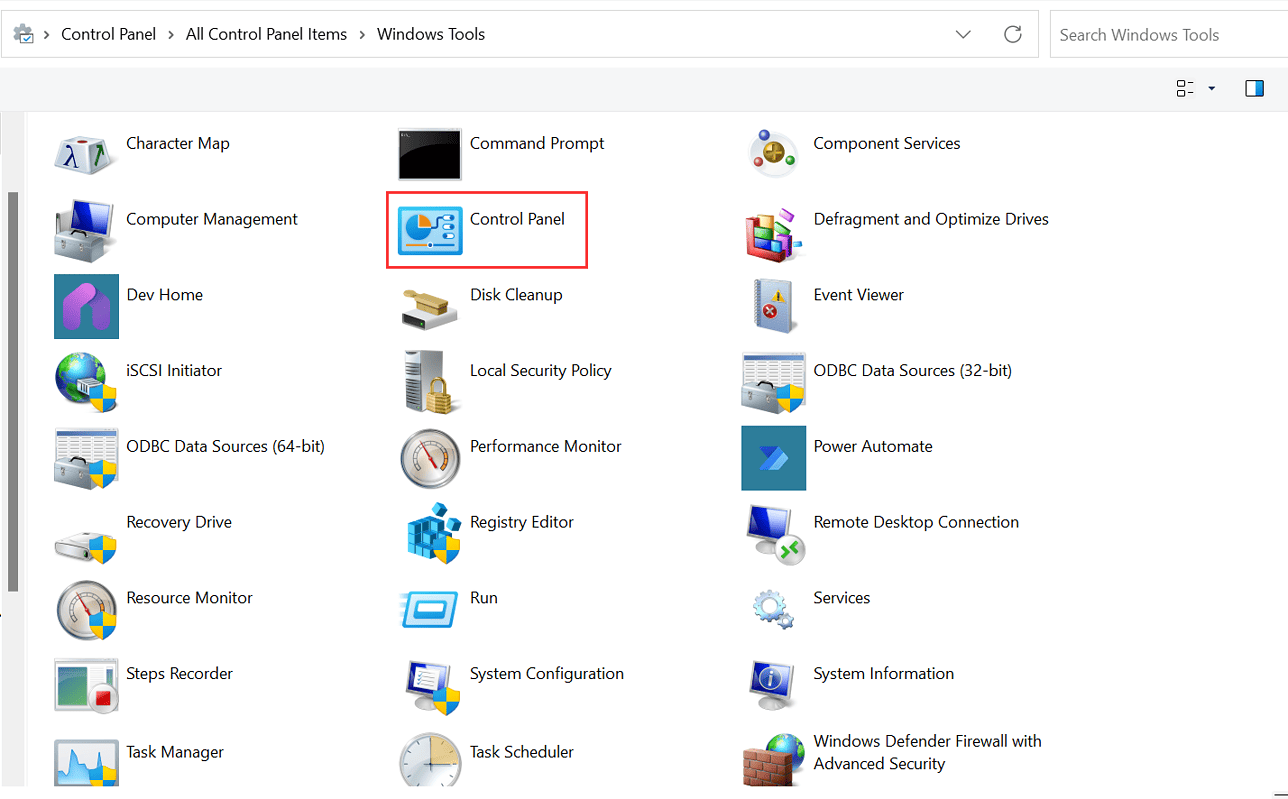
① Access the power settings by first opening the “Control Panel.”
② In the Control Panel interface, locate the “Power Options.”

③ Within the Power Options for your computer, you’ll find power plan settings, typically labeled as “Balanced” and “High Performance.”

④ Click on “Change plan settings” to configure your power plan settings to your preferences. After making the desired changes, click “Save Changes” to apply the settings.
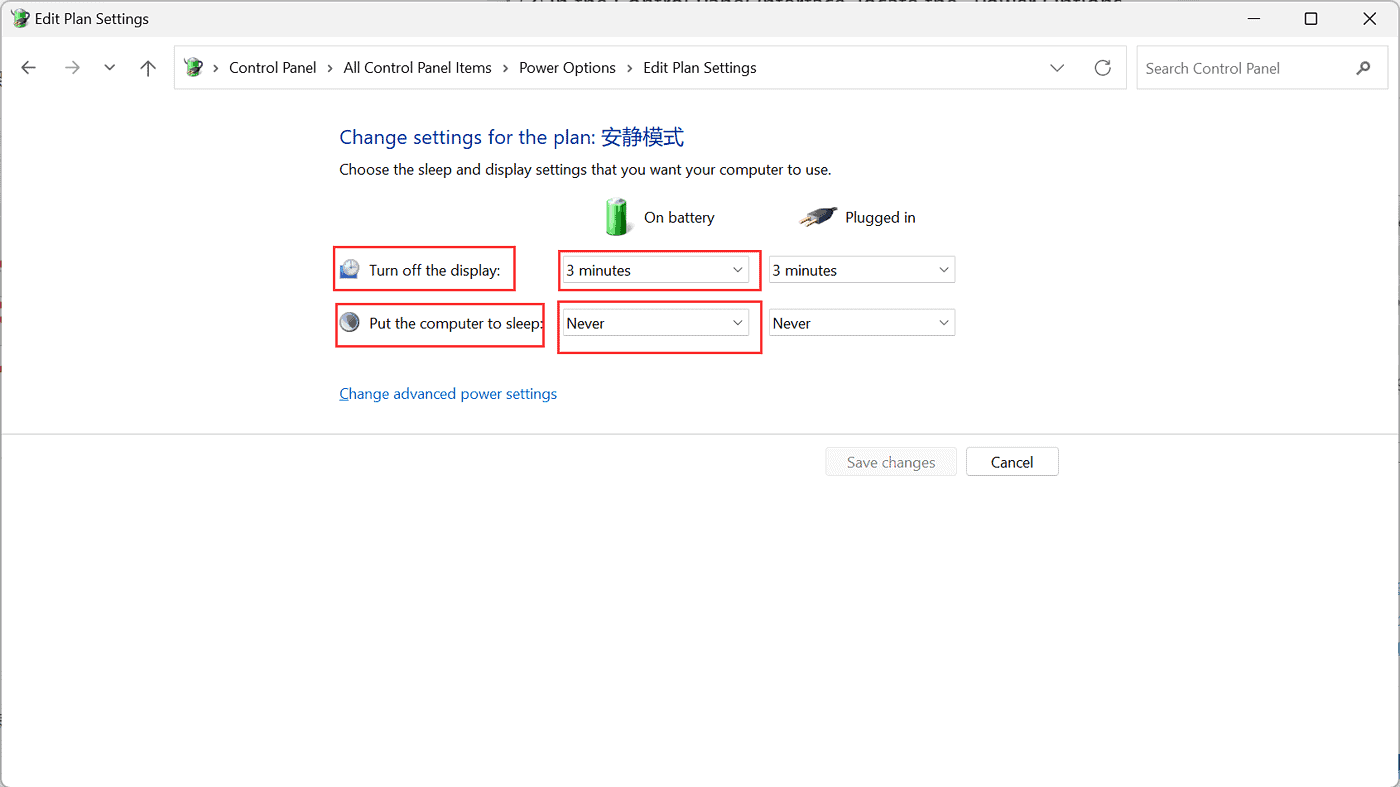
By following these steps, you can set up your computer to enter sleep mode automatically based on your chosen power plan settings.
